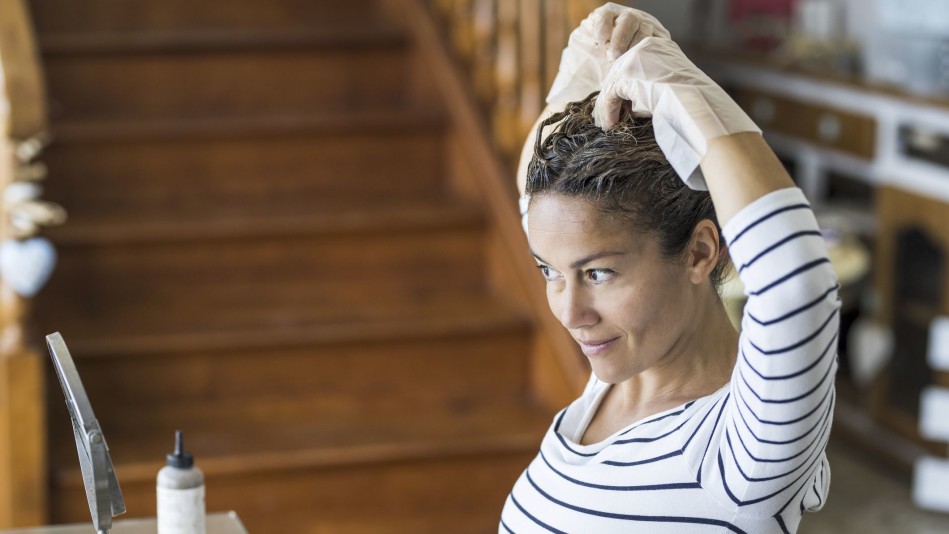
How to Dye Your Hair at Home Without Doing Damage
We asked top stylists to walk us through it.

Photos: SIMONAPILOLLA/Getty Images
Ready to experiment with a sunny summer shade or tired of looking at those grown-out brown roots or that glimmer of gray? That's what drugstore hair dye is made for... right?
But just as you reach for the box, and get ready to dye your hair at home, your heart starts pounding and you begin to wonder: Is this 30-minute activity going to ruin my strands forever? Will I have to live with some streaky shade until I can get to the salon to have a stylist fix it?
Take a deep breath. You can do this without damaging your hair. Whether you're planning to maintain your black, brown, or blonde hue, willing to give bleach a try (an advanced maneuver), or hear those fashion hues (hello, purple!) calling, follow these pro tips for dying your hair yourself.
First, select dye carefully.
To minimize damage, your best bet is to stick with a neutral color that closely matches your hair. The one exception is for redheads, who should look at the warmer colors available. And if you're torn between two colors, remember: You can't necessarily trust the model on the box—these images usually skew lighter. Instead, choose the darker one or mix the boxes together. "It's better to be slightly darker than have your roots be lighter than the rest of your hair," says Stephanie Brown, a master colorist at IGK Soho.
If you just want to try adding a fun color without the commitment or risk, try purchasing a semi-permanent dye (color that merely stains the hair and doesn't require you to mixing with a developer), says celebrity stylist Michelle Cleveland. "This type of product only sits on the outside layer of the hair and will wash out on its own after a few shampoos."
What if you want to go blonde?
If you're starting with 80 to 100 percent gray hair, the technique is a little more manageable and results will be closer to what you see on the box, says George Papanikolas, a Matrix celebrity hairstylist.
"Darker hair, and even dark blondes will usually end up with a more orange blonde using a blonde box color," says Papanikolas. Avoiding that orange hue requires bleach—something that most stylists advise against using on your hair at home, since the chemical can leave unrepairable results.
"Unfortunately, bleach lightener calls for more skill than simply putting it on your hair and waiting a certain amount of time the way you do with color or tint," explains Papanikolas. "You need an experienced eye to know when to remove it. If you take it off too soon, then it will be yellow or orange; if you leave it on too long, it can get too light and cause damage or breakage. It also requires strategic placement, and can easily leave spots on the hair if you don't apply it correctly."
If you want to proceed anyway, follow these general guidelines: "20 volume peroxide lightens your hair two levels, 30 volume lightens three levels, and 40 volume lightens four levels, says stylist Karen Wallington. And don't forget to re-dye the hair with a toner (10 volume or lower) to reduce or remove unwanted brassiness after bleaching, she says.
If, in the end, you do not get the results that you are hoping for, wait it out. "It's not worth ruining your hair by bleaching it over and over again," says Wallington.
... or ombre?
"The ideal ombre has a seamless transition from dark to light and is a difficult feat even for an experienced colorist," says Papanikolas. "In the salon we usually do a teasing technique to create the blend before applying the lightener. If you don't tease enough, you will end up with orange dip dye looking hair; if you over-lighten, hair will turn white and start breaking off."
But if you're confident you can pull it off, stylists say there are a few tricks to improve success. Look for a product called "clay bleach," since it creates a sun-kissed illusion and doesn't require any foils or extra items, says Guy Tang, a colorist and founder of #mydentity. And be sure to backcomb the hair to eliminate any risk of a harsh line in the middle of your head. Still, it's "a very advanced technique" that requires blending up and down each hair section, feathering with your brush to defuse the line between light and dark, he explains.
Once you've settled on a color, buy more than you think you need.
Always overbuy. Purchase at least two boxes for a normal amount of hair, but if you have a lot of hair or extra coarse hair, you may need three boxes, says Brown.
Change your clothes.
There's a reason your stylist wears black and has you change into a black cape when you arrive for a salon treatment—dying hair is a messy job. Put on an old T-shirt or something you don't mind getting a little dye on.
Pick a safe spot to lay out your supplies.
And get yourself situated in a suitable location—the bathroom or even outside on a nice day. Then, make sure all of your supplies are within reach: You'll need gloves, a plastic bowl to mix, and an applicator brush. The good news: Most boxed color comes with these tools.
And protect your skin.
Apply a protective barrier, such as vaseline or coconut oil, around your hairline to prevent staining, says Cleveland. Just be careful not to get any on the fine hairs that frame your face, since dye won't take to any coated strands.
Before you do anything, read the directions...
... And then read the directions again. Each brand of color is slightly different, says Cleveland. And, if you're unsure, don't be afraid to ask your usual stylist for help. "More than likely, they will help walk you through the process," says Brown.
Start with dry hair.
In general, most brands suggest applying the product to dry hair, but there are a few brands that do require your hair to be wet first—it's very brand-specific, says Cleveland.
Apply dye to roots first.
"When applying hair color to the scalp, I always pay attention to a few important signs that will help you know where to start," says Cleveland. "For example, if you have thick coarse hair that is 100 percent gray on top and only 50 percent gray in the back, you should start on the top as you may need a longer processing time in that area."
Make sure to fully saturate your strands.
Regardless of where you begin, cover all major sections people will see: hairline, part, and cowlicks. The best way to do that is to work with small sections. This helps you apply color as evenly as possible in all of the most important spots, says Brown.
The easy part: Let the dye sit.
Once stands are saturated, pin your hair up, cover with a shower cap, and let the dye soak into your strands for the time indicated in the instructions—usually between 30 and 45 minutes.
Take off your gloves as you would medical gloves—pull from the wrist and turn inside out as you remove; use that glove to tug at and remove the other glove in the same fashion.
Rinse off in the shower to avoid a mess.
The process of rinsing out the dye can vary based on the brand you choose. So—you guessed it—read the directions. Generally, though, boxed dyes suggest using a small amount of water to work the dye into a lather. (Pay attention to whether the directions suggest using warm or cool water.)
Then, dry and admire.
Once you've rinsed until the water runs clear, then shampoo as normal, using a product for color-treated hair.
Of course, you can let your hair air dry, but chances are you'll want to see the true color as soon as possible. Grab your blowdryer to get a peek sooner.
Finally, clean up your skin.
If there's any rogue dye on your hairline, hands, or even the sink, there are a few tricks to remove it, including:
- Oil: Whatever you have on hand—baby oil, olive oil, or coconut oil—will do.
- Petroleum jelly: Products like Vaseline and Aquaphor.
- Baking soda and soap: Mix equal parts.
View the original story here: How to Dye Hair Yourself at Home Without Damage.


