8 Beauty Experiments Worth Trying (and 1 to Definitely Skip)
O magazine editors test products, treatments and trends to determine what really works.
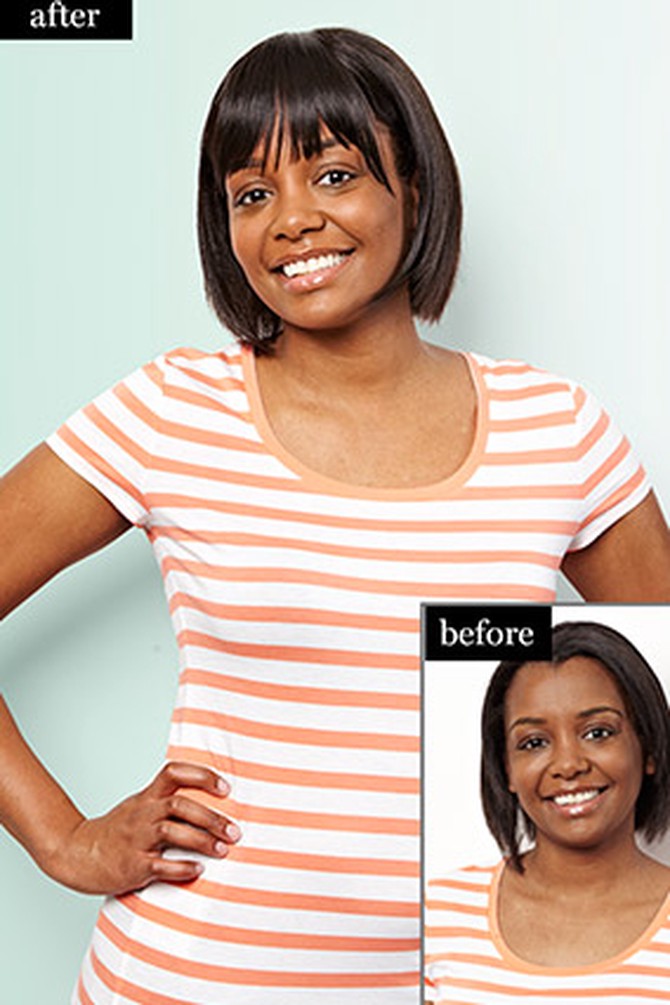
Beauty Experiment: Clip-In Bangs
Full disclosure: These aren't my first bangs. Those I got four years ago, and I loved the instant edge they gave my look. But every morning was a surprise. Sometimes all the bangs needed was a light serum to keep them in place. Most days, though, they required globs of hair gel and intense flatironing. Before long, they were thinning and breaking off. When they finally grew out, I abandoned the style forever...or so I thought, until the beauty department sent me to Butterfly Studio Salon's Bang Bar, a smorgasbord of commitment-free fringe. Their stylist sorted through 11 shades of Hairdo by HairUWear synthetic clip-in bangs to find my match. Three sturdy clips—one at the crown, two on opposite sides of the hairline—secured the hairpiece; with a quick trim, it framed my face perfectly. I was shocked at how seamlessly the faux bangs blended with my real hair. And they have a major advantage over my originals: I slipped them off before bed, and in the morning—no surprises. I'll definitely try them again for a special occasion (like one of the trillion weddings I have to attend this year...). ($30 for fringe, $20 for trim, $68 for additional blow-out; butterflystudiosalon.com)
Verdict: Do it!
—Jihan Thompson, health editor
Verdict: Do it!
—Jihan Thompson, health editor
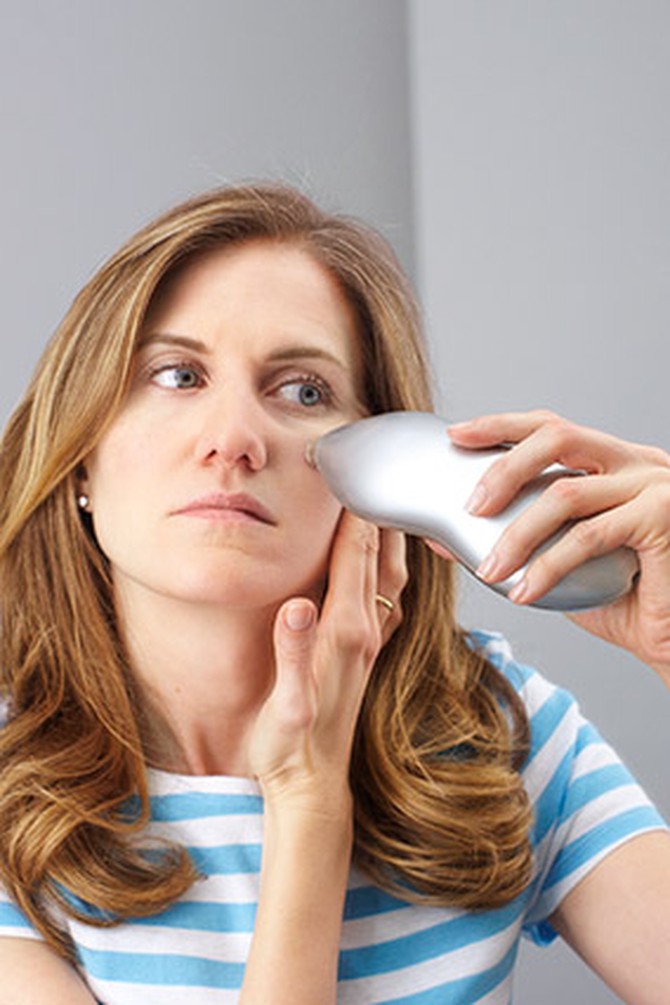
Beauty Experiment: At-Home Microdermabrasion Machines
My bathroom looks like a high-tech control station (mission: silky, glowing skin). Next to my Clarisonic skin-cleansing brush, which stands next to my Tria hair removal laser, now stand a trio of microdermabrasion devices. They mimic the action of the popular spa treatment: loosening complexion-dulling dead skin cells with a crystal-encrusted disc, then vacuuming them away. Each has several levels of suction that let you customize the intensity of your exfoliation. (Trust me: Start slow.) The Rodan + Fields machine (above) is the most elaborate, with an LCD screen that indicates where to glide the tool and a timer that beeps when I need to move on to a new area of my face. It also has the most intense suction—after my five-minute treatment, I'm beet red. The next morning, though, makeup glides over my incredibly soft, clear skin. The Riiviva and PMD Microderm have similarly silkening effects. All three are meant to be used no more than once a week, and all three do the job. But because it's light, cordless and left my skin only slightly pink, the Riiviva is the one that's going to score a permanent home at my personal skincare operations center.
Verdict: Do it if you don't have sensitive skin or rosacea. —Jenny Bailly, executive beauty editor
Verdict: Do it if you don't have sensitive skin or rosacea. —Jenny Bailly, executive beauty editor
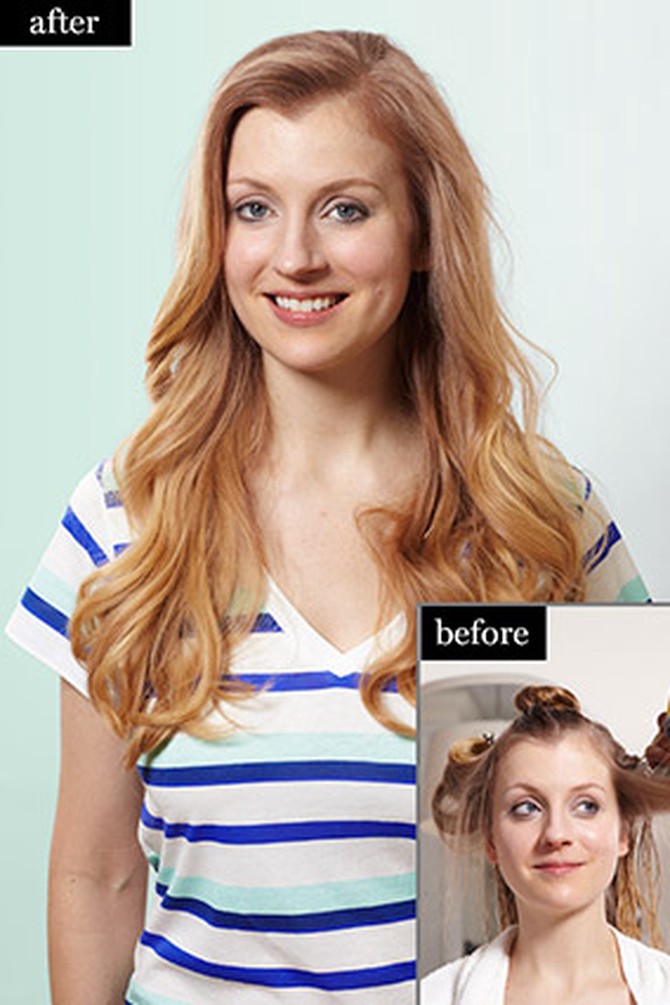
Beauty Experiment: Blow-Dry Bar
I remember being 16, standing in my bathroom in the ovenlike heat of August, aiming a blow-dryer at my head until sweat dripped down my face. My hair—the one thing about me that resembled Heather Locklear—was worth it. After an hour with my Conair Turbo, I felt as if something amazing could happen.
Maybe that's why my first visit to Drybar (the rapidly multiplying salon chain with the tagline "No cuts. No color. Just blow-outs") makes me feel nostalgic. My hair has lately been relegated to a wiry braid that I wash only when the buildup of oil and dry shampoo makes it itch. Deep down, I know this has to do with age-related defensiveness. (I'm getting older, but as you can see, I don't care.) If I preemptively bow out of the game, I can't lose, right?
After 45 minutes of my stylist's deft round-brush maneuvers, I've sunk into a meditative state. And my hair! It's dancing on my shoulders, a soft cascade of movie-star curls. I don't look like the 16-year-old I once was, with boundless hope (and more collagen), but as I walk out onto the street, I realize there's no one I need to impress. It's just me and my hair, greeting the day with all we've got. ($40; TheDryBar.com)
Verdict: Do it!
—Meredith Bryan, articles editor
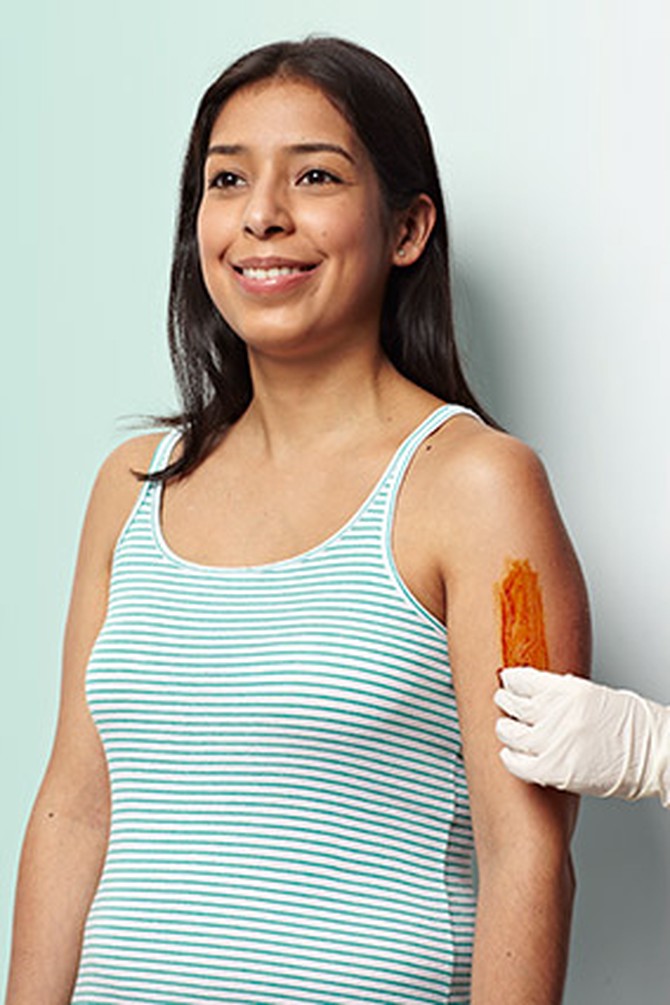
Beauty Experiment: Chemical Peel
Tired of hiding my upper arms under cardigans every summer, this year I marched into my dermatologist's office at the first sign of spring. "Scrubs and lotions aren't cutting it," I said, lifting my sleeve to show Meghan O'Brien, MD, of Tribeca Park Dermatology, the pimple-like bumps along my triceps. "I need the big guns."
My problem: keratosis pilaris. In addition to the annoying bumps—caused when skin cells called keratinocytes accumulate and plug hair follicles—I had developed noticeable dark patches.
O'Brien suggested a chemical peel to lift away the upper layers of skin, clearing out the hair follicles and removing excess pigment. She used a mix of trichloroacetic, retinoic and salicylic acids called VI Peel (a good choice for darker skin tones like mine). After she wiped on the mildly tingly acid solution, she waited two minutes before neutralizing it with a towelette soaked in retinoic acid and vitamin C.
Within hours, the skin turned alarmingly dark and started flaking. By day four, it was coming off in sheets. But finally, after ten days of intense peeling, my arms were smooth, even-toned, and tank-top-ready. The doctor says I may be bump-free for months—possibly longer if I use a prescription 40 percent urea foam lotion daily and a retinoid cream twice a week. ($300 to $500 per treatment; vipeel.com for physicians)
Verdict: Do it if you have tried at-home exfoliation to no avail (and are prepared for serious molting).
—Alessandra Foresto, associate beauty editor

Beauty Experiment: Press-On Wrinkle Treatment
When I was asked to take part in this beauty adventure story, I thought, Jackpot! What would they ask me to try? Botox? A fancy spa treatment? Then came the official beauty department e-mail: "How about face-smoothing patches you apply at home?" Er, okay.
According to the package, the BioBliss Anti-Wrinkle Patch System contains micro-current technology that infuses the skin with hyaluronic acid, peptides and other plumping ingredients to reduce the appearance of fine lines. I used both the forehead and eye-area patches. When I peeled off the thick, rubbery pads after 30 minutes, my pesky frown lines did appear less deep. By the end of the day, though, I looked as fine-lined and unplumped as ever. The directions suggest using the system weekly for more lasting results; I think I'll just cross my fingers and wait for next year's beauty adventures. ($25 each; biobliss.com)
Verdict: Skip it!
—Naomi Barr, research chief
Beauty Experiment: IPL Machine to Fade Scars
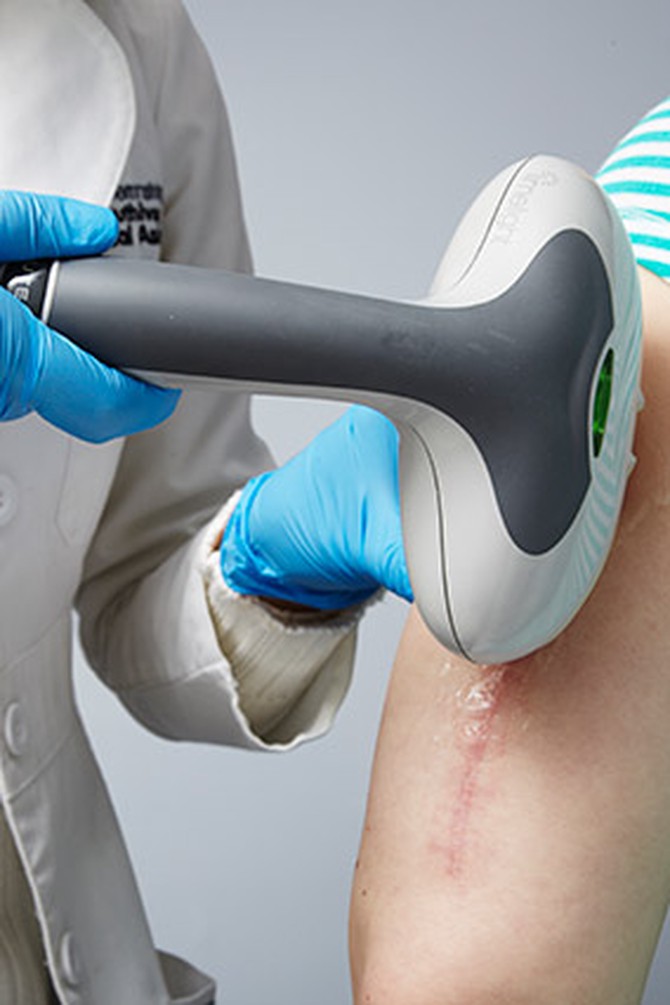
The villains of this story are a broken arm, an itchy plastic brace and a prolific stack of medical bills. The setting is an orthopedics practice where, after six months, a surgeon proclaims that the arm just won't heal. The plot involves an operation, nine titanium screws, a six-inch rust-colored scar—and me, one epically exhausted protagonist. So when the beauty department arranges for Cheryl Karcher, MD, of Sadick Dermatology, to take a pair of high-powered, skin-smoothing, redness-reducing lasers to my scar, I enthusiastically agree: Losing that red menace gets me closer to forgetting the whole awful experience ever happened. First, Karcher treats me with the Cutera LimeLight, an IPL (intense pulsed light) machine that reduces pigmentation. Since I've applied a numbing cream 30 minutes prior to the treatment, it feels like she's flicking me with a rubber band. After a week of healing, the scar pales dramatically. (I cry with joy.) Next comes the more intense Fraxel Dual laser, which stimulates collagen beneath the skin's surface—I won't lie, that one hurts—and which utterly obliterates the puckering. (I cry again.) Then another week, another IPL, and another shade lighter (and more tears) brings Karcher's assurance that one or two more sessions will render the scar nearly imperceptible. I'm looking forward to my happy ending. ($400 to $800 per IPL session, $750 to $1,500 per Fraxel session; physicians' offices)
Verdict: Do it!
—Katie Arnold-Ratliff, senior editor
Verdict: Do it!
—Katie Arnold-Ratliff, senior editor
Beauty Experiment: Extreme Makeup
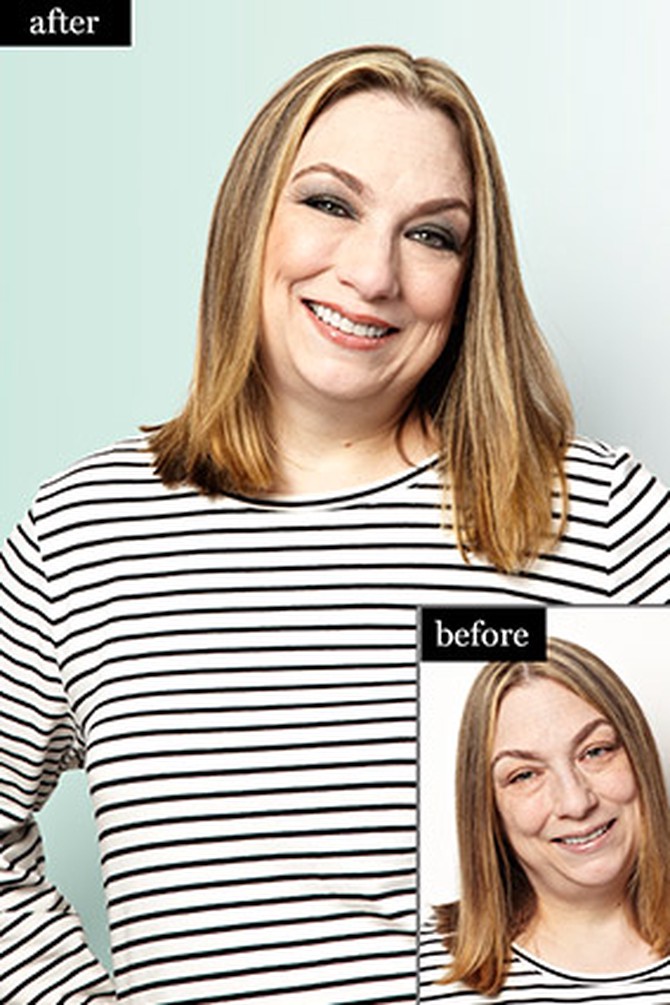
There was a time, I kid you not, when I refused to leave the house without heels, big hair and a full face of makeup—my quiet homage to the women of Knots Landing. But that was 30 years and a thousand somebody elses ago. Today I've got one daughter, two jobs, a special-needs rat terrier, very little energy and even less time. Still, tired of always looking tired—and pressured by the beauty department—I reserved a recent afternoon to slip my exhausted self onto a stool at the makeup counter of a Manhattan department store.
"I need a little oomph," I tell the makeup artist–salesperson. She springs into action, uttering just two words: "smoky eyes." So authoritative is her conviction that I find myself nodding in complete agreement. Over the next half hour, a grand total of 21 products are smudged, smeared and dabbed from my throat to my hairline—apparently I require smokiness from the neck up. For reasons I will never comprehend, she lines the inside rims of my upper eyelids, commanding me to breathe as she scratches away. "Breathing keeps you from tearing uncontrollably," she assures me as I tear uncontrollably. After five minutes, she pronounces me fabulous and hands me a mirror.
"I hope you're going somewhere very special tonight," she says. I don't have the heart to tell her I have a date with a fourth grader whose math homework neither of us understands. Or that the face she's created for me does not go with the life I've created for myself. Instead, I buy tinted moisturizer and lipstick and brace for a very special night of long division.
The next day, after two hot showers and 11,000 baby wipes, the black liner that refuses to budge from my eyes has actually left them subtly defined. It's a morning-after makeup miracle! I use the tinted moisturizer to even out my skin tone and apply the soft, pinky beige lipstick. I may not feel well-rested, but I look it—and that's a pretty nice start.
Verdict: Do it!
—Lisa Kogan, writer at large
Beauty Experiment: Lash and Brow Tint
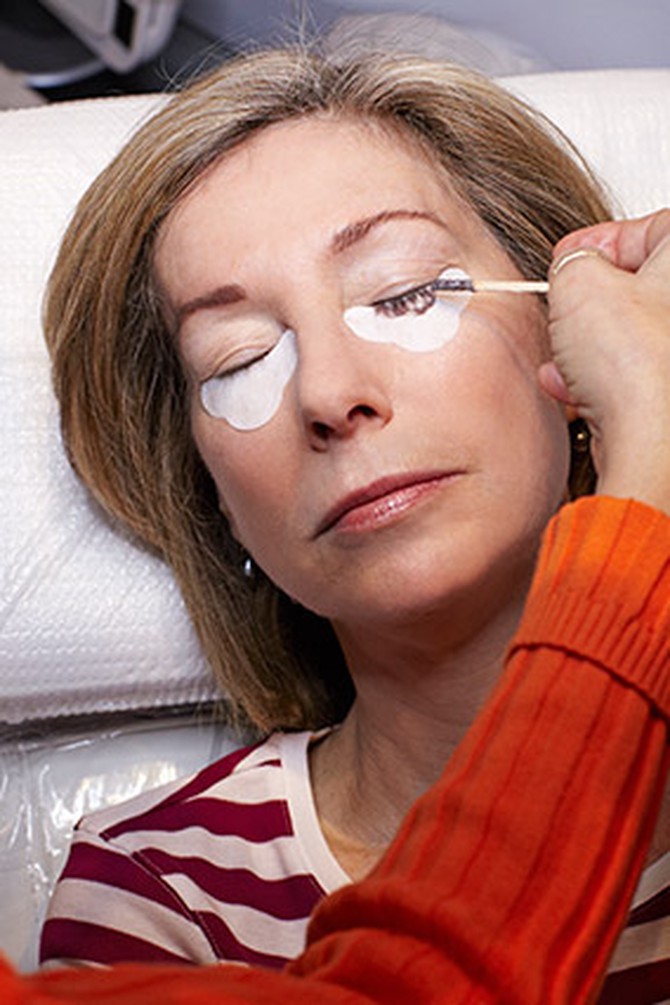
"Don't open your eyes!" commanded eyebrow expert Eliza Petrescu as she gently pushed a cotton-tipped applicator dipped in blue-black vegetable dye down to the roots of my eyelashes. (I know: Yikes!) With some anxiety, I wondered whether my closed lids were completely sealed. Eliza had placed adhesive patches under my eyes to protect my skin, but preserving my sight was evidently up to me. "Keep not opening them," said Eliza, now brushing the dye through my lashes with a bare mascara wand. She waited about five (long) minutes before she swiped a cotton pad soaked in water over each eye to remove the excess dye. "Okay, open up," she said, and the moment I did, she popped one drop of Visine into each eye. I looked at Eliza, so glad to see her.
"Now close your eyes!" she said, before using another applicator to cover my brows with an auburn-brown vegetable dye, followed by a bare mascara wand to brush the dye through. This color she left on for only about two minutes because she wanted to keep my brows a natural shade and because they were flecked with just a few gray hairs. (If I'd had more of those, she would have left the dye on a minute or two longer.) To be sure she wouldn't stain the skin around my brows, she wiped the area with a mixture of toner and almond oil. Then she passed me a mirror so I could evaluate her handiwork. Blue-black lashes! Distinctive brows! And a greatly increased appreciation of a skilled aesthetician. ($65 for lash tint, $45 for brow tint; elizaseyes.com)
Verdict: Do it if you have some gray in your brows or pale lashes.
—Valerie Monroe, beauty director
Beauty Experiment: At-Home Pedicure
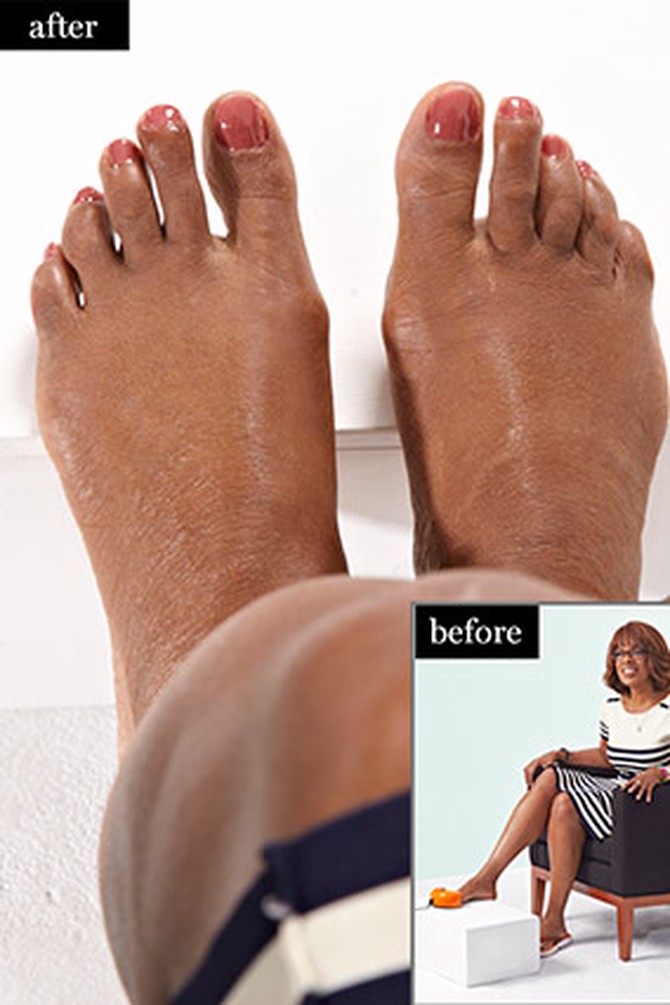
I'm not a DIY beauty girl. The closest I get to doing my own pedicure is slathering my feet in lotion and pulling on a pair of socks. I'm always up for an adventure, though, so I was game to try the Sally Hansen Salon GelPolish system on my toes. Here's how it works:
1. Apply base coat.
2. Put your foot (or hand) inside the LED light box for 30 seconds (it automatically turns off when time is up). This sets (or "cures") the polish.
3. Apply two coats of color. The key to success: very thin coats. My first time around, I painted the polish on too thick and it peeled right off.
4. Cure color with the light for 30 seconds after each coat.
5. Apply top coat; cure for 30 seconds. Use an alcohol-soaked pad (included in the kit) to wipe away the sticky residue on the surface of your nails. They're instantly dry!
6. A perfect (DIY) ten.
($70 for starter kit, $20 for refill kit of base and top coats and cleanser pads; drugstores)
—Gayle King, editor-at-large
Next: 18 outstanding doctor-recommended anti-aging products
From the June 2013 issue of O, The Oprah Magazine

