Get a Perfect At-Home Manicure in 7 Easy Steps
Photo: Chris Ecker/Studio D
Before
It has often been suggested to Melanie Chambers, a photo editor here at O, that she consider a gig on the other side of the camera—as a hand model. The compliments inspire her to polish her nails, religiously, once a week—but the results aren't usually fit for a close-up. So manicurist Roseann Singleton walked Melanie through her fine-tuned technique. First: Swap her go-to pinks for a deep purple; it's more striking against her pale skin.
Photo: Chris Ecker/Studio D
1. File Your Nails
Make sure they are completely dry (filing wet nails can cause splitting). Rounded nails (mirroring the shape of your cuticle) that extend just over the edge of the fingertip always look elegant.
Photo: Chris Ecker/Studio D
2. Soak Your Nails
Apply a rich hand cream. Then, soak your nails in warm, soapy water for five minutes to soften the cuticles. (One hand at a time if you want to flip through a magazine or play with your iPad.)
Photo: Chris Ecker/Studio D
3. Push Back Your Cuticles
Push back your cuticles with a wet nail stone. If you have a hangnail, trim it; otherwise, don't clip cuticles (they protect nails from infection).
Photo: Chris Ecker/Studio D
4. Apply a Basecoat
It helps the color go on smoothly and last longer. Try OPI Natural Nail Base Coat. Or, if your nails have ridges, Essie Ridge Filling Base Coat.
Photo: Chris Ecker/Studio D
5. Brush On Two Coats Of Color
Brush on two thin coats of color, waiting a couple of minutes after each hand. Use three strokes on each nail—on either side of the nail, then a swipe of color across the tip to prevent chips.
Photo: Chris Ecker/Studio D
6. Apply a Top Coat
Singleton likes CND Air Dry, which helps cut drying time. Don't forget to swipe the top coat across the top of each nail as well, as you did with the color.
Photo: Chris Ecker/Studio D
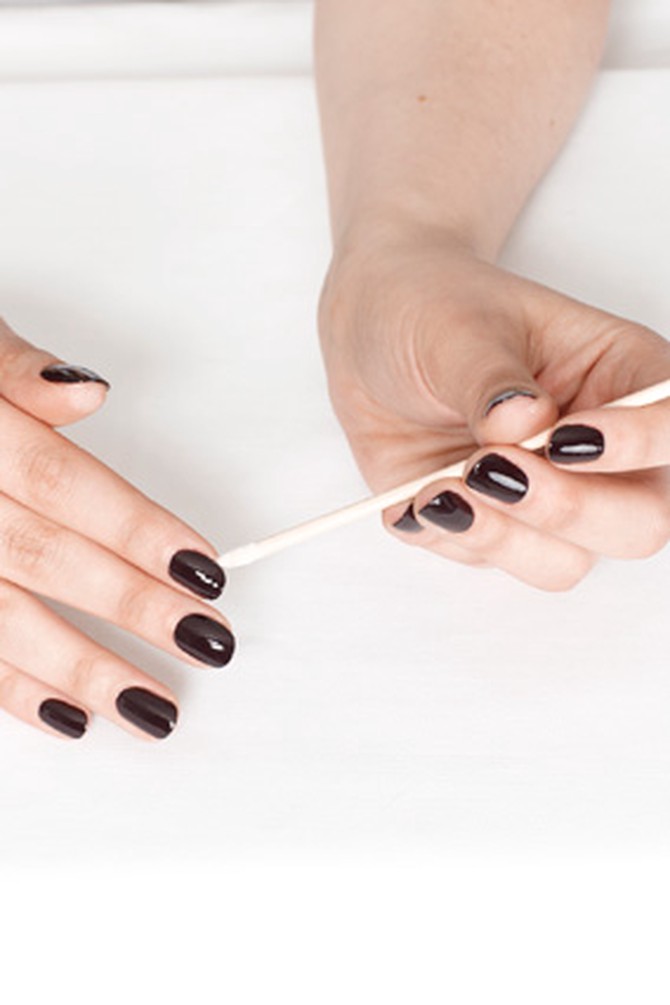
7. Clean Up Any Smudges
Clean up any color outside the edges of your nails with an orange stick wrapped in a thin layer of cotton and dipped in polish remover.
Photo: Chris Ecker/Studio D
After
Tip: Not ambidextrous? Join the club. To minimize slipups, paint your dominant hand first (it's even trickier to use your nondominant hand when the nails are wet with polish) and always move from your pinkie to your thumb (which tends to rotate inward as you go and could get smudged).
Next: Fall's most fabulous nail polish shades
From the
September 2011 issue of
O, The Oprah Magazine