6 Things We All Forget to Clean—but Shouldn't
In her book The Complete Book of Clean, Toni Hammersley shows us the unexpected dust- and dirt-collecting spots that are keeping your home from sparkling.
By Toni Hammersley

Photo: Courtesy of The Complete Book of Clean
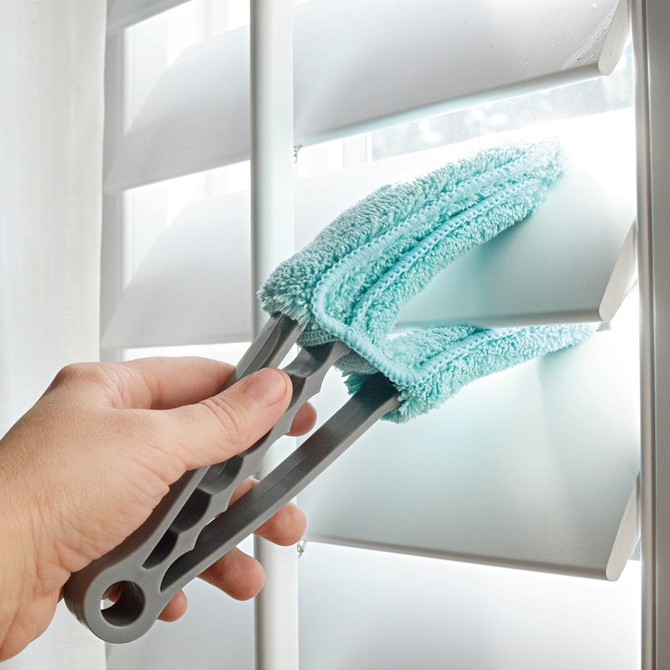
1. The Blinds and Shutters
Since tending to them thoroughly can typically add a lot more time to our cleaning routines, blinds and shutters get overlooked more often than not. Be sure to give them the attention they need whenever you clean, and get into the habit of properly cleaning them monthly.
Spot Clean
Using an all-purpose cleaner and a microfiber cloth or a specialty tool designed to clean blinds and shutters, wipe away dirt as needed.
Dust Monthly
Using a vacuum dust-brush attachment on the lowest setting, suction the dirt away. Glide the brush attachment horizontally (not vertically) along the blinds or shutters. Start at the top and move your way down, then reverse the blades and dust on the other side.
Deep Clean
If the dust has turned to gunk (as often happens in the kitchen, where steam and grease are in the air), it’s time for a more thorough cleaning on removable blinds. Pull the blinds up all the way before lifting them off their supports, and they will be easier to transport. Using a soft sponge, briefly soak and wash them in the bathtub to remove grime. Rinse well, then lay them out on towels to completely dry before rehanging

Photo: Courtesy of The Complete Book of Clean
2. The Bedframe
We’re so good about cleaning sheets and pillowcases, but the frame—be it a wood tester, an upholstered headboard, a metal canopy, or a modern platform—gets taken for granted. Dust monthly with a damp microfiber cloth to avoid buildup.

Photo: Courtesy of The Complete Book of Clean
3. The Vent Hood
The overhead vent above your cooktop absorbs grease and smoke every time it’s turned on, which means that its filters need a good cleaning every 3–6 months. You can clean the filters on the low-heat cycle of your dishwasher, but they usually have so much collected grease that it’s best to wash them without other dishes in the cycle. If you wash them by hand, a long soak is recommended.
Step 1
Spray an appropriate cleaning solution on the surface panels of the vent hood. Depending on the surface material, choose either an nonabrasive vinegar cleaner a mild soap solution, or follow guidelines for stainless steel. Wipe clean with a microfiber cloth. If you have not done this in a while, ready yourself for the collected grime and resolve to clean the hood more often!
Step 2
Remove the filters and put them in the sink or someplace large enough to submerge them in water. Sprinkle 1/2 c. baking soda on top of the filters and fill the sink or tub with scalding water (from the tap or boiled in a kettle). Let the filters soak for a few minutes to help break up any caked-on grease. After soaking, scrub lightly and persistently with a soft-bristled brush that will not damage the delicate filters in the hood.
Step 3
Rinse with water and let the filters air-dry. Put them back in the vent hood after they have completely dried out.

Photo: laurenbergstrom/istock
4. The Knife Block
You clean your knives every time you use them. What about the knife block? Dust and crumbs accumulate in its slots. Periodically turn the vacuum on high suction and hold it over the slots. Clean the exterior as you would a wood cutting board

Photo: monkeybusinessimages/istock
5. The Garbage Bin
No matter how meticulous you are about using trash bags, things of unknown origin will make it to the bottom of the can. The key is to regularly clean it before the grime builds up! Put on gloves and take the can outside or put it in the shower. Thoroughly rinse it with hot, soapy water and use a scrub brush to dislodge stubborn gunk. Rinse and let it dry. Air-drying in the sun naturally disinfects, but spraying with a disinfectant is still recommended.

Photo: KatarzynaBialasiewicz/istock
6. The Refrigerator Condenser
Regular cleaning of the condenser coils on the back of fridges and freezers keeps them operating at maximum efficiency, reducing power usage, and extending the life of the unit. Manufacturers recommend cleaning the coils every 3-6 months, and more often if you have any pets.
Read
Refer to the manufacturer’s manual to locate the condenser and fan, and review any specific warnings that may apply to your particular model.
Reveal
Use a flashlight to more easily spot any obscured patches of dust or cobwebs.
Clean
Slide a refrigerator coil brush—a long, short-bristled tool— between coils to remove dust and fuzz. Work gently to avoid damage.
Remove
Have the vacuum handy to remove dust and cobwebs from the coil brush as you work. Once finished with the refrigerator coil brush, you can vacuum the condenser with a crevice or brush attachment, again working carefully. While the unit is away from the wall, remember to vacuum the exposed floor.

Excerpted from The Complete Book of Cleaning by Toni Hammersley. Copyright © 2017 by Weldon Own Inc. Reprinted by permission of Weldon Own Inc., an imprint of Bonnier Publishing USA.
Published 04/04/2017

