
How to Dye Your Hair at Home

Photo: Alex Beauchesne
The right haircolor can transform your looks—enliven your skin tone, cover grays, add sparkle to your eyes. But getting color at the salon can run upwards (in some places, way upwards) of $75. So, in the spirit of fiscal responsibility, we enlisted a world-class professional colorist to give a step-by-step tutorial on exactly how to color your hair at home—for a lot less.
Happily, the technology has come a long way in the 50-plus years since Clairol debuted its first do-it-yourself kit. "The dyes today are not only less damaging but more translucent," says our professor, Sharon Dorram of Sharon Dorram Color at Sally Hershberger in New York City. "You no longer get dense, monotone shades." (We also noticed that the dyes smell far less acrid than they used to.) With Sharon at the blackboard—yes, that's her at left—we recruited three women to enroll in Home Haircolor 101. She guided them through the entire process, from shade selection to final blow-out. If you're ready to dye at home, don't start before reading these 5 simple rules: - Be Conservative: Don't choose a color more than two to three shades lighter or darker than your natural color.
- Enlist a Friend to Help: She can ensure that you don't miss a spot on the back of your head.
- Use Natural Light: The forgiving dimmer switch in your bathroom won't do you any favors when you're trying to gauge the intensity of a new haircolor.
- Always Condition: Most kits come with a tube of deep conditioner. Use it right after you rinse out the dye, then do a deep-conditioning treatment at least once a week after that. It will help preserve color and shine.
- After Your First Time, Dye Only Your Roots: Your hair will get brittle, and your color patchy, if you recolor your whole head every six weeks. When your roots start to show, apply dye only to the regrowth; comb it through the rest of your hair a few minutes before the processing time is up.
Before you begin any color job, you'll want to have on hand a few items that don't come in most haircolor boxes.
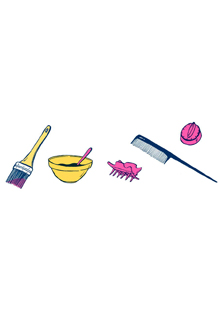 Paintbrush: Unless your hair is quite short, it's easier to use than a bottle. The ideal brush is one and a half to two inches wide.
Bowl: To mix up the dye, and swirl the brush in.
Clips: To hold back the rest of your hair as you work the dye through each section.
Rattail comb: Use the narrow pointed handle to divide hair into even sections, and the comb to distribute the dye.
Two dark towels: One to drape over your shoulders to protect your clothes; one to clean up any drips.
An alcohol-based facial toner: It helps remove stains from skin—and floors and countertops.
Timer: To make sure you don't wind up with a color very different from what you expected.
Before You Start, Make Sure to Do a Strand Test
Sometimes it's a great idea to jump headlong into a new project—but a home haircoloring session is not one of those times.
 You must ("must, must!" says Sharon) do a strand test to (1) make sure you like the color and (2) determine how long you need to leave the dye on. Here's how: Dye a section of hair a quarter to a half inch wide about a quarter inch above your ear (so you can see the color against your skin). Make sure it's underneath the top layer of your hair. Wipe off the color with a wet cloth after half of the designated processing time (i.e., 15 minutes if the box says 30). Blot dry, then check it against a white towel in natural light to get an accurate read of the shade. If you're happy with it, that's all the time you'll need. If it's not quite there yet, reapply dye for the remaining time and check color once more before committing your whole head.
 Next: Jason Backe, Clairol's color director, shares what he knows about how to get salonlike results on your own
NEXT STORY
