5 Essential Foam Roller Moves for Women
How to work out your worst kinks.
By Emma Haak
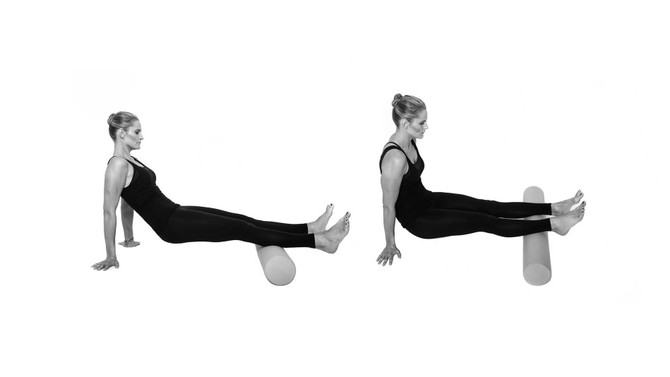
Photo: © Collin Stark
These exercises from Lauren Roxburgh, a certified personal trainer, fascia and alignment specialist and the author of the new book Taller, Slimmer, Younger: 21 Days to a Foam Roller Physique, help loosen up the fascia in the areas that tend to be the tightest among her female clients: the back line of the body, the hips and the neck. (Too much time spent sitting is usually to blame.)
"Think of fascia as a wetsuit that runs underneath your skin and wraps about each individual muscle," Roxburgh says. "When it gets stiff, you feel almost brittle and rigid, and it holds you in uncomfortable and unnatural postures. Using the roller helps release the fascia so you can move more freely." Grab a roller (Roxburgh recommends soft-to-medium, rather than super-hard ones) and get started.
Calf Roll [pictured above]
- Sit on your mat with your legs close together and the roller placed under both of your calves, right below the knee joint. Place your hands palms down on the floor a few inches out from your hips, fingers pointing outward. Press down into your hands to lift your bottom off the mat, keeping your calves balanced on the roller. Make sure to draw your shoulders down and back to avoid hunching.
- Continue pressing your hands down and engage your core, exhaling to slowly drive your body weight forward so that the roller stops right above the ankle.
- As you inhale, slowly draw the roller back so that it stops right below the knee.
Repeat 3 sets of 8 rolls. The roller should be placed under the center of your calves for the first set, the inner edge of the calves for the second set, and the outer edge of the calves for the third set.
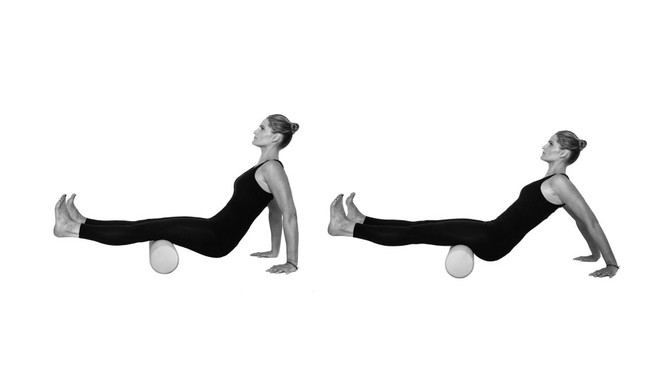
Photo: © Collin Stark
Back of Thigh Roll
- Sit on your mat with the roller under your hamstrings, right above the knee joint. Place your hands on the mat behind you, with fingertips slightly turned out. Press your hands into the mat to lift your bottom off the floor, and engage your core.
- Keep your shoulders back and inhale as you roll the roller up the back of your thighs.
- Exhale as you roll back down to the starting position.
Repeat this movement 8 to 10 times.
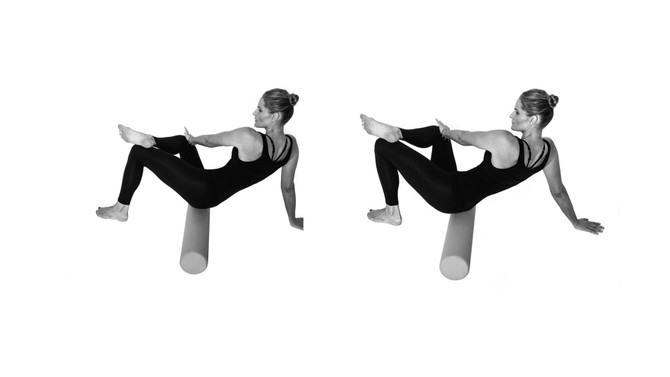
Photo: © Collin Stark
Figure Four
- Sit on the roller and reach your right arm behind you with your right hand on the mat, thumb out to the side. Cross your right ankle over your left knee to form a figure four. Press your left hand down into your right inner thigh.
- Shift your weight slightly over to the left hip/glute area and roll back and forth a few inches in each direction.
- Next, roll in circles to help increase circulation and blood flow and to reduce congestion.
Repeat this movement on the other side.
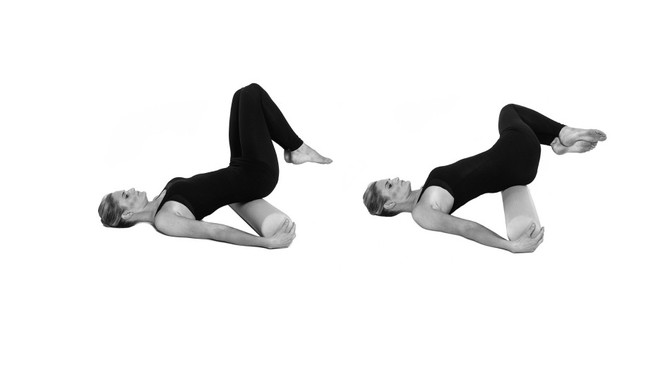
Photo: © Collin Stark
Inverted Tush Roll
- Slide the roller under your hips/sacrum (the triangular bone at the base of your spine), just above the tailbone. Lift your knees up so they are hovering directly over your hips. Hold either side of the roller.
- Inhale as you twist and draw your knees over to the left at a 45-degree angle.
- Exhale, using your core to return to center.
Repeat this movement 8 times on each side, alternating sides.
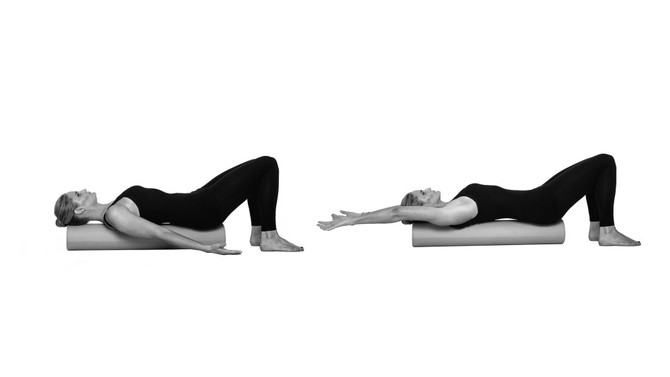
Snow Angels
- Lie on the roller with your spine supported from head to tailbone. Begin with your arms extended down by your sides, with the palms of your hands facing up to open and expand the chest.
- Inhale deeply as you reach your arms up overhead slowly and with control, keeping them as close to the mat as possible and parallel to the floor.
- Exhale completely as you draw your arms back down to your sides.
Repeat this movement 8 times.
From the book TALLER, SLIMMER, YOUNGER: 21 Days to a Foam Roller Physique by Lauren Roxburgh. Copyright © 2016 by Lauren Roxburgh. Reprinted by arrangement with Ballantine Books, an imprint of Random House, a division of Penguin Random House LLC. All rights reserved.
Published 02/24/2016

